Concerning microcontrollers I have been a little “lazy” during the past two years but I tried to at least keep an eye on what was going on. For next year I plan to continue my adventures into microcontroller land. I am currently researching to select the target platform for the upcoming projects.
I am exited that it is now possible to bring all my favorite tools together so I again stand on the shoulders of giants:
- ESP-32 - successor to ESP-8266
- BMP-280 - digital temperature, pressure, and humidity sensor
- FreeRTOS - rock solid scheduler for microcontrollers, certified AWS integration
- MQTT - lightweight publish / subscribe message transport
- AWS (Amazon Web Services) - awsome cloud platform
Originally I intended to use the Arduino IDE which I liked a lot during the past years. During my research I learned about ESP-IDF which I am going to use instead.
In some aspects ESP-IDF is similar to Arduino:
- easy to add open source components to your projects like for example sensor drivers
- the build system is easy to use and just works (CMake and Python scripts)
- simple to flash the microcontroller
- growing open source community
- industry support i.e. Amazon
Some aspects are different than Arduino (where the platform is aimed at professional developers):
- command line use
- integrates in your favorite IDE
- full control if/where you need it
I should mention that Amazon runs a similar project based on the same technology stack but targeted to their range of supported microcontroller platforms. I think for AWS / IoT beginners this is a good path for getting started with this technology.
I myself do not need the flexibility of supporting microcontroller boards besides esp32 and I love the easy and elegant way of adding components to my projects using ESP-IDF so I prefer working with it directly.
Installation
First we need to install system prerequisites, ESP-IDF and xtensa. I install everything into the ‘esp’ folder in HOME.
Some prerequisites
My laptop has Arch Linux… You need to find out how to install these on your OS.
On arch installing system prerequisites is easy enough:
$ sudo pacman -S --needed gcc git make ncurses flex bison gperf python-pyserialESP-IDF
$ cd ~/esp
$ git clone --recursive https://github.com/espressif/esp-idf.git
$ cd ~/esp/esp-idf
$ git submodule update --init --recursive
I use virtualenv for the python installation (but this is up to you).
$ cd ~/esp
$ pip install -r esp-idf/requirements.txt
add this line to your ~/.bashrc file:
export IDF_PATH=~/esp/esp-idfxtensa
download “https://dl.espressif.com/dl/xtensa-esp32-elf-linux64-1.22.0-80-g6c4433a-5.2.0.tar.gz”
and extract into ~/esp:
$ tar -xzf ~/Downloads/xtensa-esp32-elf-linux64-1.22.0-80-g6c4433a-5.2.0.tar.gzadd another line to your ~/.bashrc file:
alias get_esp32='export PATH="$PATH:$HOME/esp/xtensa-esp32-elf/bin"'With this you can call ‘get_esp32’ whenever you need it. If you do not need to use other frameworks you can add the entry to your PATH permanently.
Try out everything with an example project
After the installation it is a good practice to make sure everything works… This saves your from the pain of “debugging” the installation while working on your projects code.
Copy the prepared hello_world example into a new project and configure:
$ get_esp32
$ cd ~/esp
$ cp -r $IDF_PATH/examples/get-started/hello_world .
$ cd ~/esp/hello_world
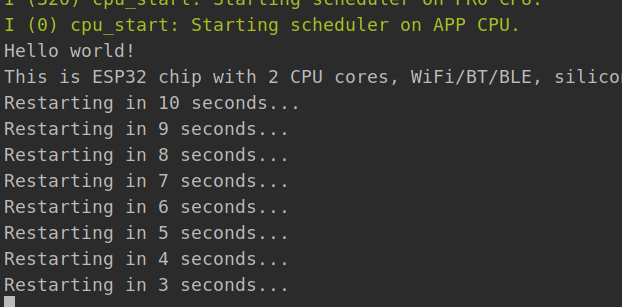
$ make menuconfigLet’s try out the hello_world example! build, flash and monitor:
$ make flash monitorPlease make sure to provide sufficient power to your esp32 otherwise it will constantly reboot. On my first try I had connected the esp32 via USB cable directly to my laptop (which obviously does not provide enough power). Now it is connected via an USB-Hub and works fine.
AWS cloud integration
The project I am working on is to use the esp32 to take sensor measurements (temperature, humidity, pressure) from BME-280 and to send them into the cloud.
Clone the sample repository
Clone the examples from my Github repository esp32:
$ cd ~/esp
$ git clone https://github.com/finklabs/esp32.git
AWS IoT security certificate & policy
For this to work you want your esp32 to talk to your personal AWS IoT account. This needs a few steps to configure access and credentials and usually you have to do it only once. It is a bit involved especially if you do it the first time. There is no way around it but you will find on the web many useful tutorials on how to manage AWS IoT security certificates.
Use the AWS Console to create an AWS IoT certificate and download it into the “~/esp/esp32/iot-bme280/main/certs” folder.
Add a policy to the certificate (I called it “farm_devices_policy”) to define/limit which resources your device can access (to limit the blast-radius be restrictive! only open up what needs to be open):
{
  "Version": "2012-10-17",
  "Statement": [
    {
      "Effect": "Allow",
      "Action": "iot:Connect",
      "Resource": "arn:aws:iot:eu-central-1:123456789012:*"
    },
    {
      "Effect": "Allow",
      "Action": "iot:Publish",
      "Resource": "arn:aws:iot:eu-central-1:123456789012:*"
    },
    {
      "Effect": "Allow",
      "Action": "iot:Subscribe",
      "Resource": "arn:aws:iot:eu-central-1:123456789012:*"
    },
    {
      "Effect": "Allow",
      "Action": "iot:Receive",
      "Resource": "arn:aws:iot:eu-central-1:123456789012:*"
    }
  ]
}
AWS IoT endpoint
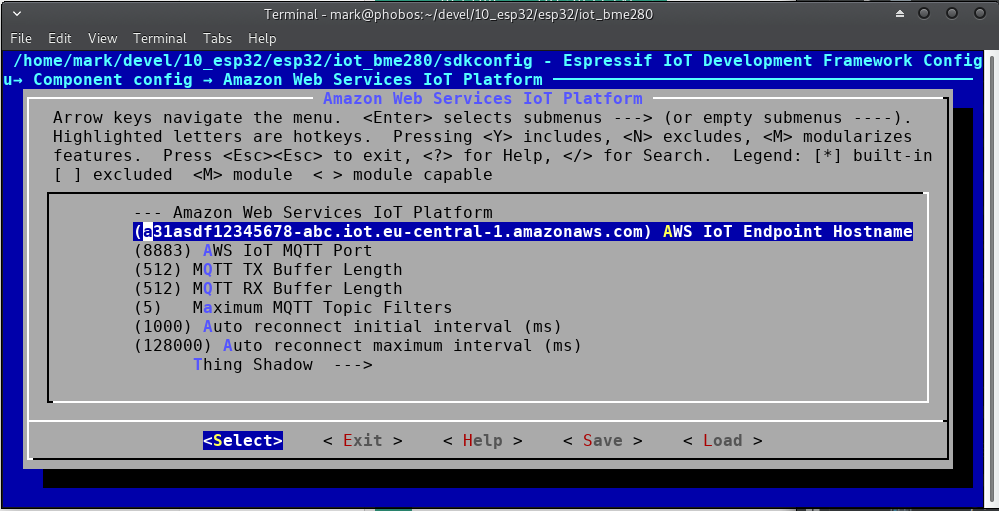
In the AWS IoT console (settings) lookup the IoT endpoint URL for your account: “asdf12345678-abc.iot.eu-central-1.amazonaws.com”.
Alternatively if you have the AWS CLI installed, you can use it to retrieve the value:
$ aws iot describe-endpoint --endpoint-type iot:Data-ATS
{
    "endpointAddress": "asdf12345678-abc.iot.eu-central-1.amazonaws.com"
}
You need to enter the iot endpoint value in “make menuconfig” for the aws_iot component:
AWS root certificate
Download the AWS root ca certificate from “https://docs.aws.amazon.com/iot/latest/developerguide/managing-device-certs.html” and store it in “esp32/iot-bme280/main/certs/aws-root-ca.pem”.
Verify that the root certificate works with your endpoint:
$ cd ~/esp/esp32/iot-bme280
$ openssl s_client -CAfile main/certs/aws-root-ca.pem -connect asdf12345678-abc.iot.eu-central-1.amazonaws.com:8883
In the command output we are looking for “Verification: OK”
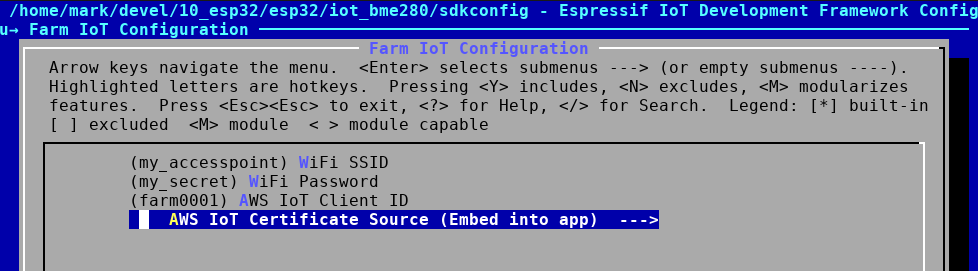
Setup wifi credentials
Your esp32 needs wifi access. Again you use “make menuconfig” to set the credentials:
Build and flash
$ make flashAgain, please make sure to provide sufficient power to your esp32 otherwise it will constantly reboot.
Subscribe MQTT client and receive data
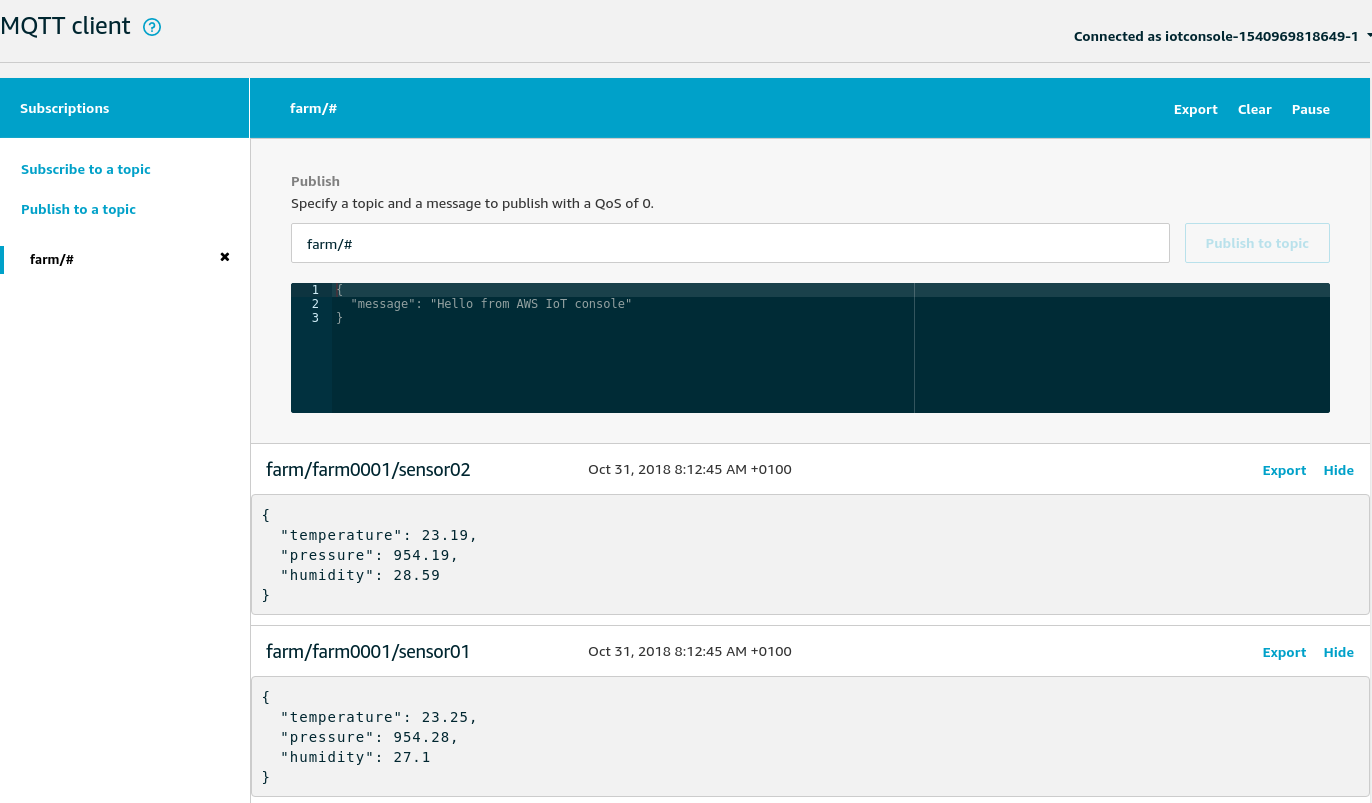
For testing / troubleshooting purposes I use the MQTT client of the AWS IoT console to subscribe to topics “farm/#”.
Once sent by the esp32 the measurements show up instantly in the MQTT client. The following screenshot shows the messages dropping in:
Add an IoT rule to store measurements on S3
I want to store my measurement data on Amazon S3 so I can analyze them later with AWS Athena. In order to do so I setup a AWS IoT rule.
I call the rule “farm_archive_sensor_data” and use an SQL statement to wildcard-query all farm devices “SELECT * FROM ‘farm/#’”:
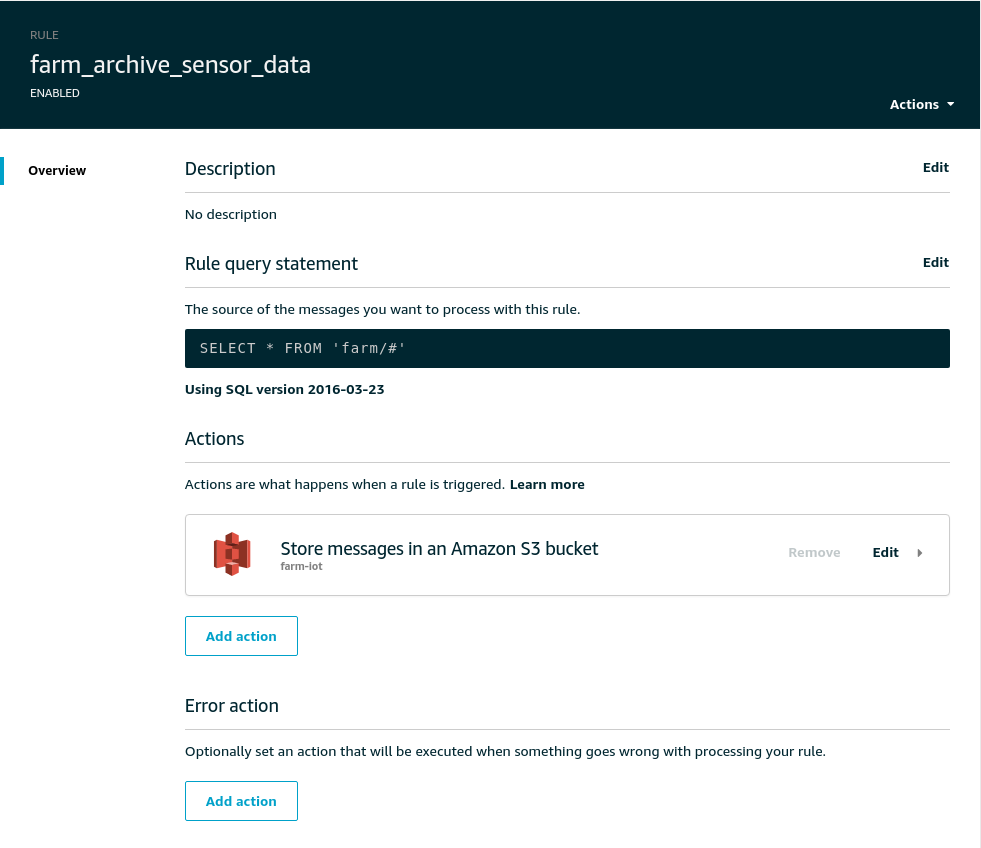
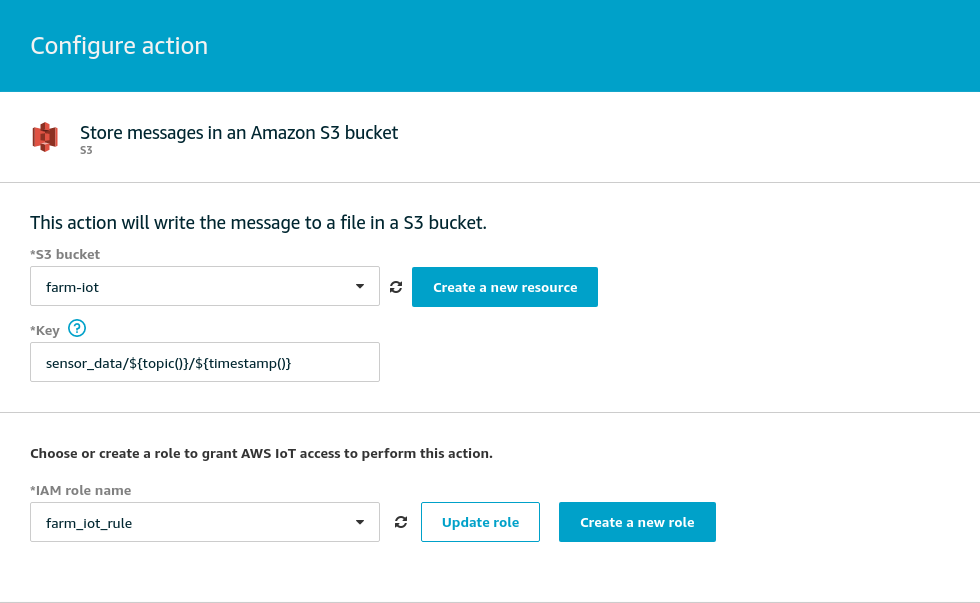
For the rule I setup an action that is used once the rule is triggered. For the S3 action I choose the relevant S3 bucket, define the key (relative path to store the file containing the timestamp of the message), and a role grant access to the S3 bucket.
The following screenshot shows the measurements stored on S3 as a result of the “farm_archive_sensor_data” rule:

I hope this post is helpful to you.
All the best, Mark